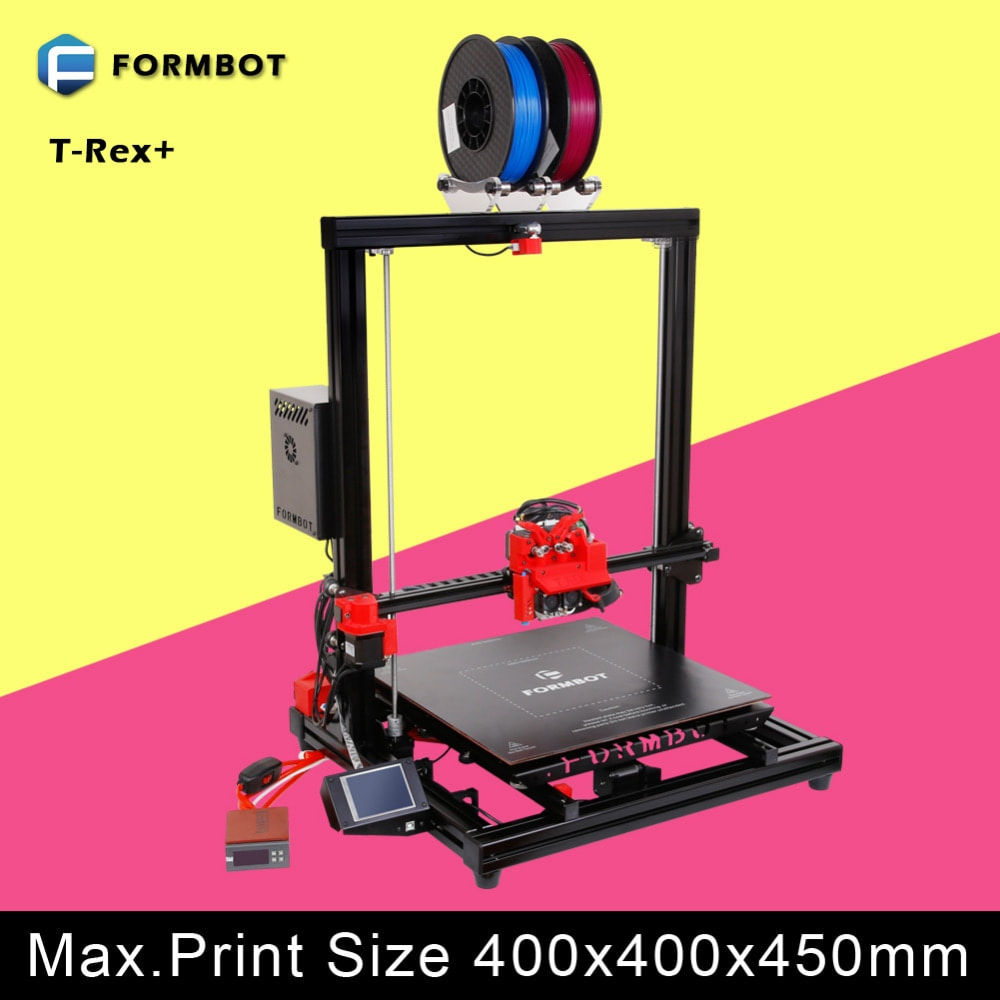
Formbot T-Rex 2+
After owning and enjoying a couple of small 3D printers (Da Vinci 1.0 and a Prusa) I decided to take the plunge and get something a little bigger.
After doing months of research I opted on the Formbot T-Rex Plus and I'm very happy with the choice. Sure it was pricey at over $2000 CAD but compared to others in that size range it was a steal. I've got a good 500 hours of printing on it and it's still going strong. One thing to be said is this printer takes up a lot of room on the desk and its quite loud. Normally the noise would'nt bother me but with a big printer come long printing times and after 4 hours it starts to echo around in my head.
After doing months of research I opted on the Formbot T-Rex Plus and I'm very happy with the choice. Sure it was pricey at over $2000 CAD but compared to others in that size range it was a steal. I've got a good 500 hours of printing on it and it's still going strong. One thing to be said is this printer takes up a lot of room on the desk and its quite loud. Normally the noise would'nt bother me but with a big printer come long printing times and after 4 hours it starts to echo around in my head.
|
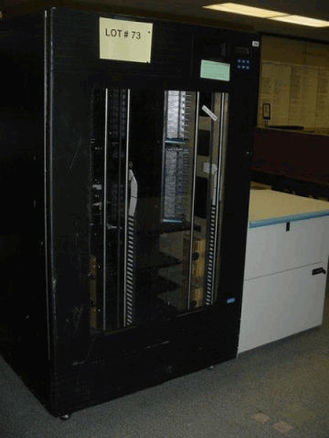
Thats why I jumped at the chance when an old Qualstar Tape Library came up for grabs - like (but not) the one here in the picture. Where other people saw an giant, heavy piece of junk I saw a perfect, beautiful enclosure for my big 3d Printer.
The first step was how to get it home...... |
FINALLY in thE WORKSHOP
|
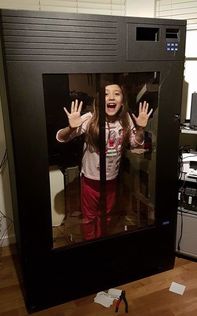
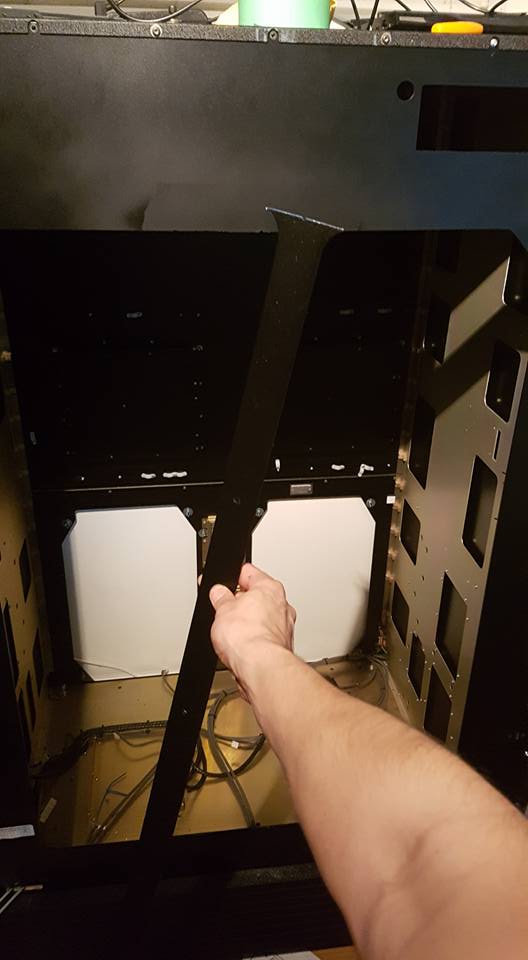
After a couple of weeks of slowly gutting the Qualstar Tape Library, while putting any useful parts to one side (this thing was full of stepper motors and metal rods) the beast of a case was ready to come home. I convinced a good friend with a truck to help and the journey went well enough, that was until we got to the workshop... I measured the 2 door frames it had to go through, I new it was going to be tight, and it was. Both doors had to come off their frames, and it slid through the first frame with mm to spare. The second door was a little tougher, we had to remove around 50 screws from the front and back of the case to shave off the extra 4 mm that the screw heads were adding. I guess I won't be moving anytime soon. I then locked a child inside to give an idea of the scale of this thing. |
|
Test Fit
|
|
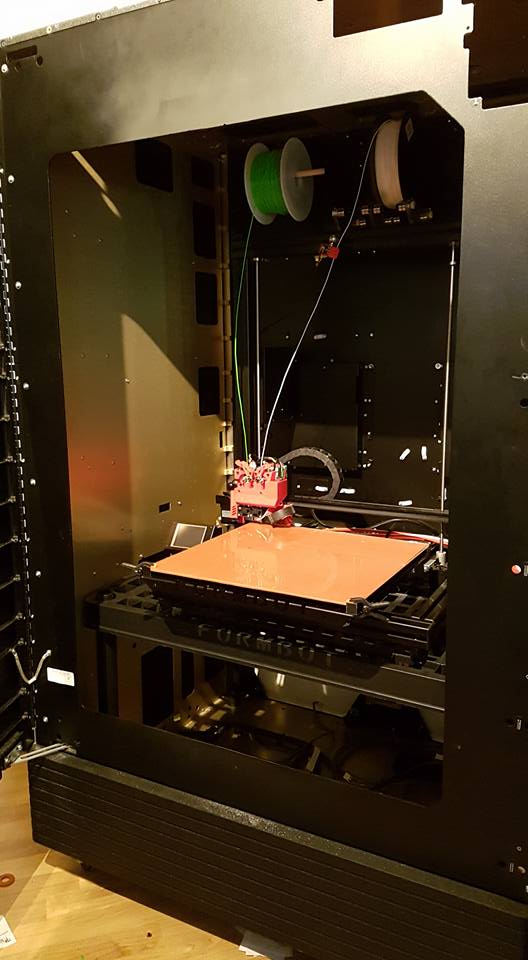
I cut away the middle piece of metal from the front of the case as it wasn't providing any support and was going to be in the way. I also put in a temporary shelf in to do a test fit as you can see it fits with about 2 cm to spare front to back.
There a good amount of storage room underneath for filament as well.
Shortly after taking the picture I realized that I would have to have the printer in there sideways so the bed had enough room to side around while printing.
There a good amount of storage room underneath for filament as well.
Shortly after taking the picture I realized that I would have to have the printer in there sideways so the bed had enough room to side around while printing.
Filament Rod Holder
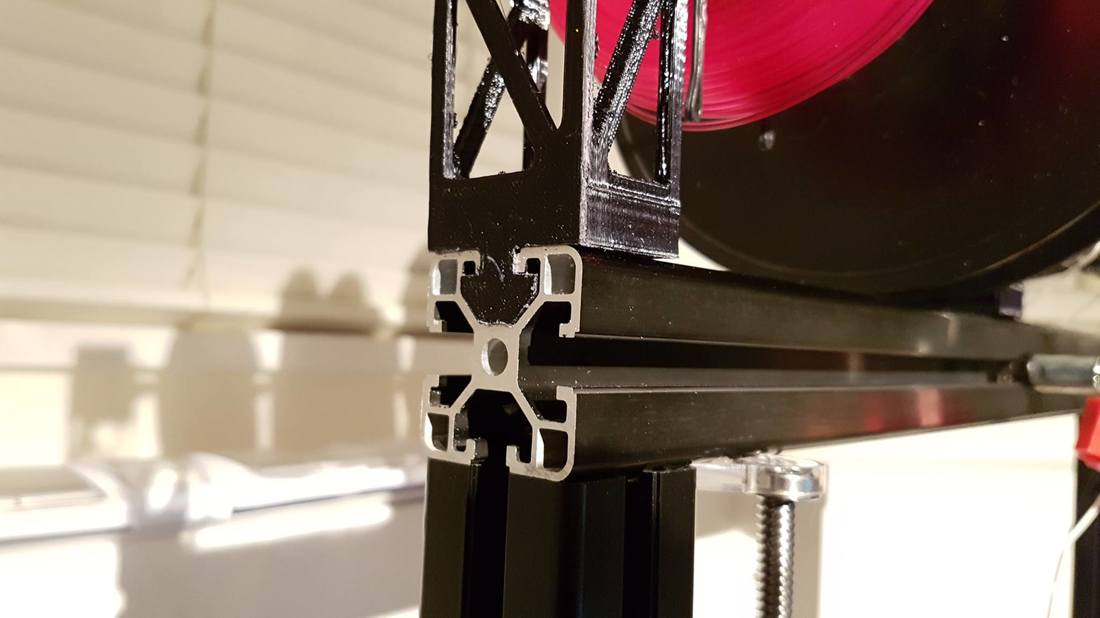
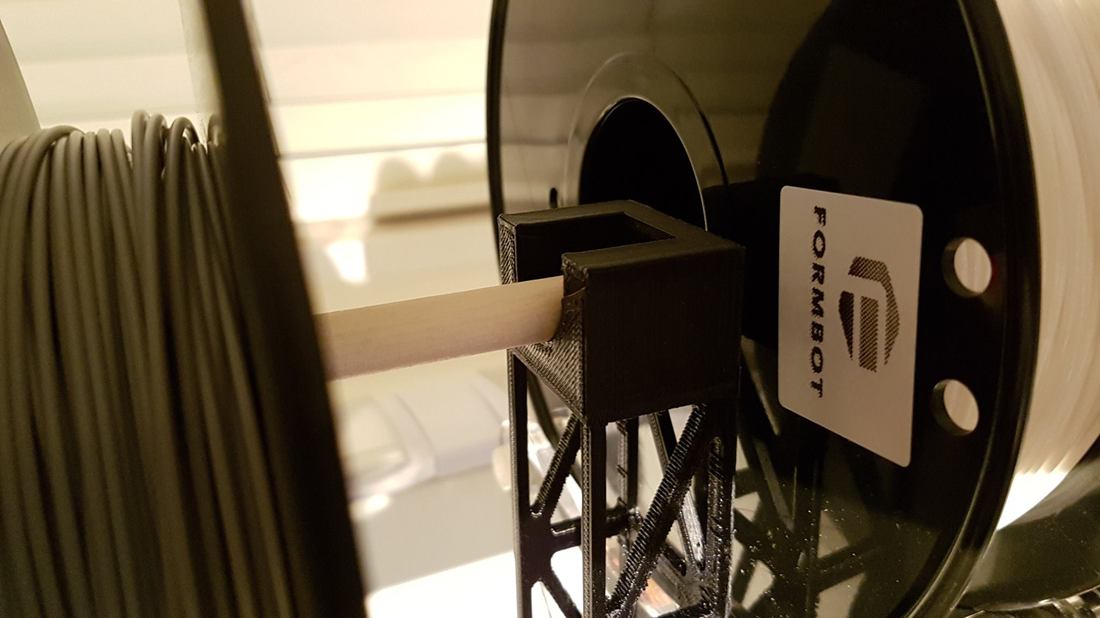
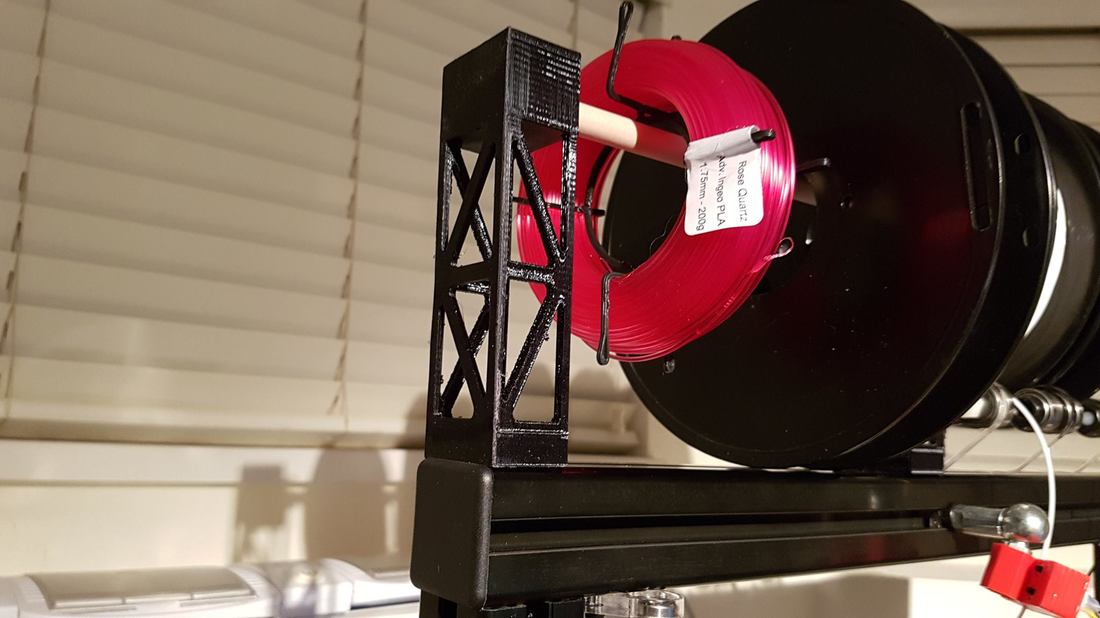
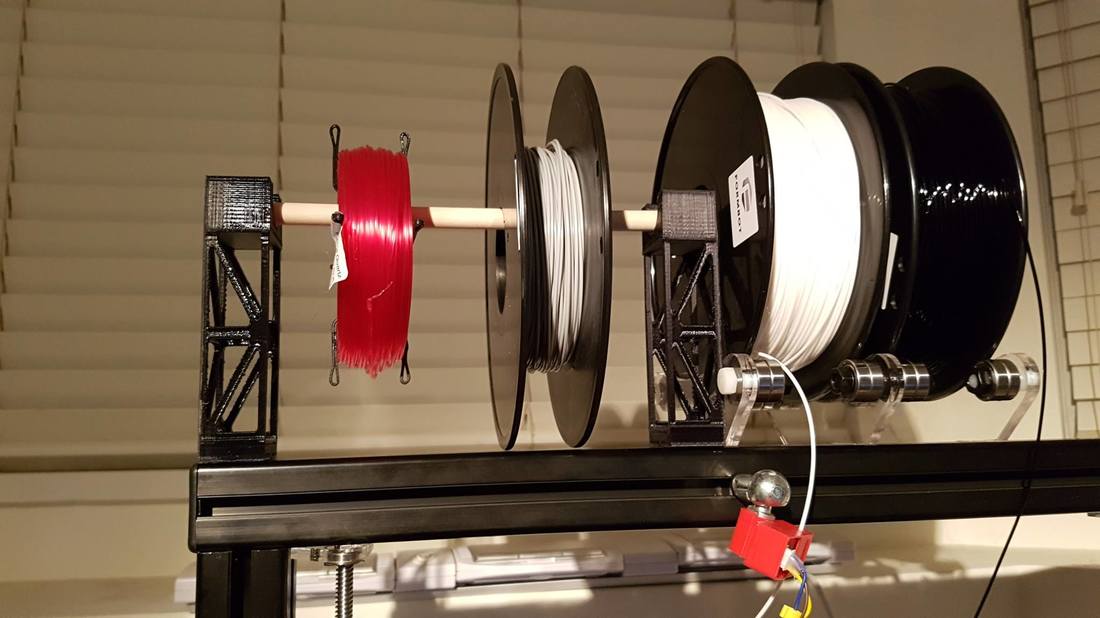
I got a litte bored of having to almost climb inside the case and move the filament rollers back and forth when I hand a different filament roll size so I decided to make a "Filament Rod Holder". It slots into the top of the T-Rex Plus allowing you a place to put a rod to hang your odd sized filament roles.
Print out a couple of them and find a piece of wood or a metal rod and you're good to go.
http://www.thingiverse.com/thing:1838546
Print out a couple of them and find a piece of wood or a metal rod and you're good to go.
http://www.thingiverse.com/thing:1838546
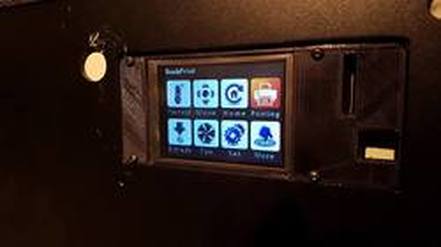
Relocated The Touch Screen
|
|
This week I modeled a mounting for the touch screen so I could relocate it to head height. I had to extend the cables and to do this I re-purposed some of the wiring I saved when gutting the case. I think it looks pretty good and works with the door open and closed.
|
|
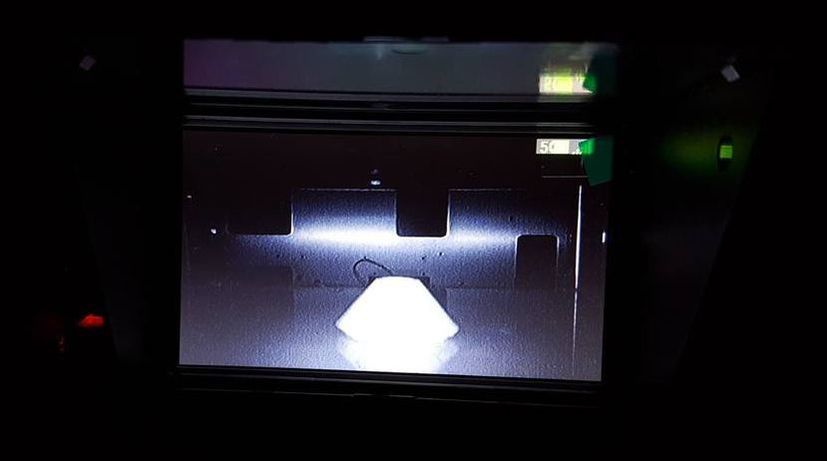
Remote VIEWING
|
|

|
With the other printers, I used to use an old video baby monitor to watch my prints while I was out of the room for long periods at a time. I also tried a
mid-range web camera for a while but was never happy with it.
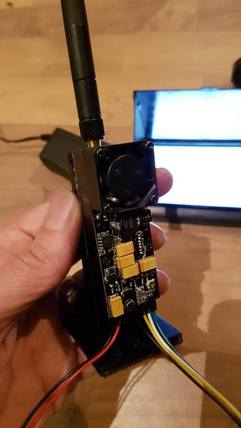
I have a small RC Drone store that I run on the side and have a bunch of video transmitters, low light cameras, and video receivers so I decided to build a custom video monitoring system. The total cost was around $120 CAD which is much cheaper than an off the shelf solution and has a much larger range.
I chose a cheap camera that has a built-in mic and infrared, printed a base for it and mounted it to the inside of the case with velcro.
I also modeled and printed a holder for the transmitter, the TX580 is a 5.8G 500MW Transmitter and has a working voltage of DC7.2 V to 12.8 V. It also has a 5V out to power the camera. Again its held in place with velcro.
The Video Monitor has a built-in receiver and battery, I mounted it to the side of the case to charge and keep it out of the way.
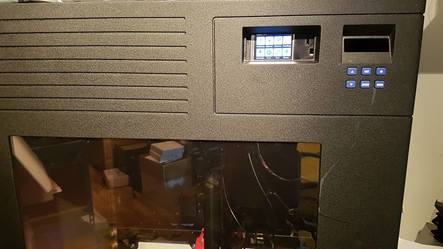
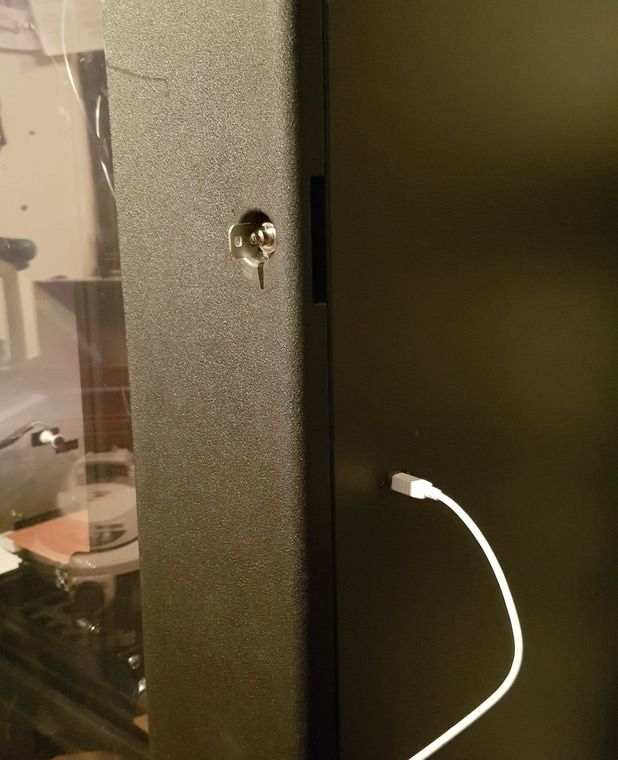
USB Port
|
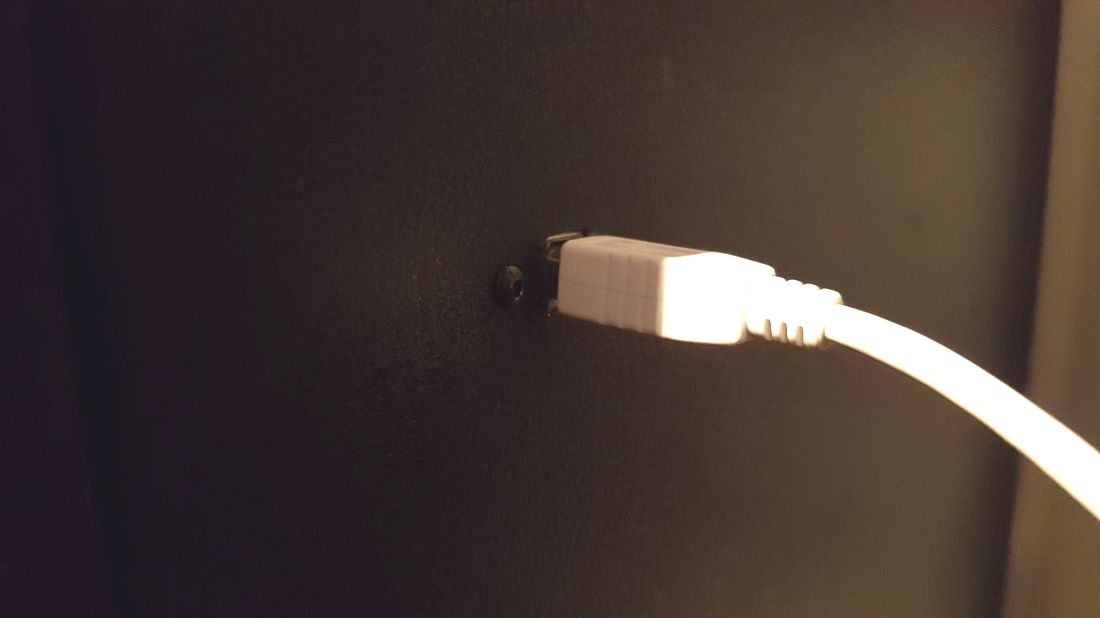
With a little bit of drilling and filling I now have the USB port on the side of the case.
I know it's not very exciting but I now have no more cables on the ground to trip over or unplug by mistake. |
